Welcome to the Neel theme documentation. These instructions briefly explain how to set up and configure all the theme features.
Theme Installation Guide
To utilize any of our themes, you’ll need to first install and activate them. The process is just like uploading a normal theme.
Navigate to WordPress Dashboard > Appearance > Themes > Add New. In the search theme box, search for the Neel theme. Click on Install and once installed activate the theme.
For in-depth documentation about WordPress theme manual installation, read the official WordPress.org documentation.
Theme Customization Options
Benner Section
User can choose to add banner to the site’s frontpage and other pages. The banner can be image or simple color background banner with banner title, subtitle and a call to action button, post slider. The banner section also gives user different options to customize the banner section.
Banner Media
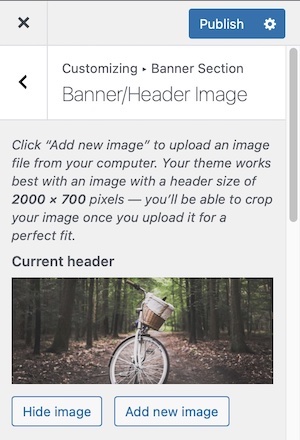
If user has set banner type to image, then the image uploaded in media section will be displayed in site banner.
Banner Options
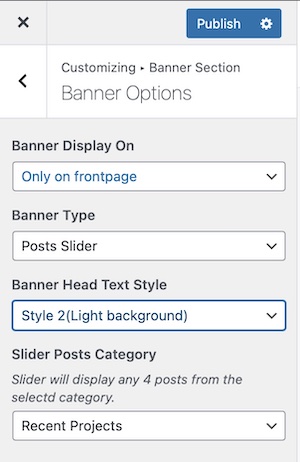
- Go to Dashboard > Appearance > Customize > Banner Section
- Go to Banner MediaSet your desired image for Image Bannersection.
- Click on Save to retain the selections.
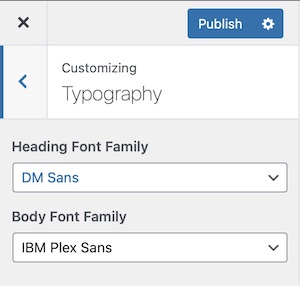
Typography section in customizer allows you to set font-family for
- Body text
- Headings
Five different google font options are available for the body and heading font family.
Theme Other Options

Neel theme has easy to customize theme options. With these customization options, the user can change the look and feel of the site.
Blog Page Options
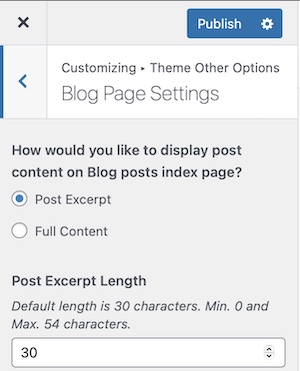
This section allows you to customize Blog Page/Index Page. It has the following customization options:
User is given two choices. Whether to display post excerpt or full post on blog posts/posts index page.
User can also set length of the post excerpt displayed on the blog index page.