Welcome to the Neel theme documentation. These instructions briefly explain how to set up and configure all the theme features.
Theme Installation Guide
To utilize any of our themes, you’ll need to first install and activate them. The process is just like uploading a normal theme.
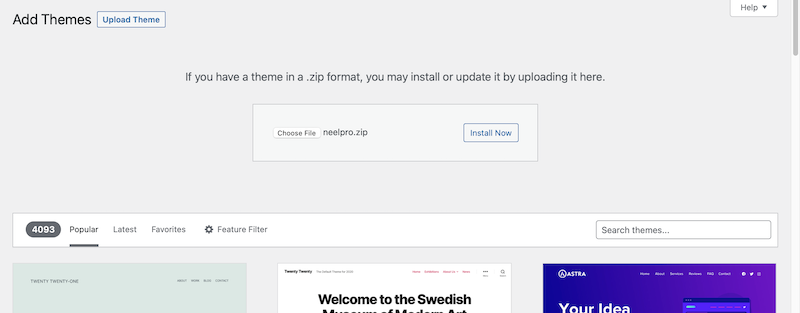
Navigate to WordPress Dashboard > Appearance > Themes > Add New. In the search theme box, search for the Neel theme. Click on Install and once installed activate the theme.
For in-depth documentation about WordPress theme manual installation, read the official WordPress.org documentation.
Theme Customization Options
Custom Logo
User can add his/her brand logo in the custom logo section.
- Go to Dashboard > Appearance > Customize > Site Identity.
- Upload the logo image.
- Click on publish to retain the selections.
Banner Section
User can display an image bannner, post slider or color banner depending on the user choice.
Banner Media
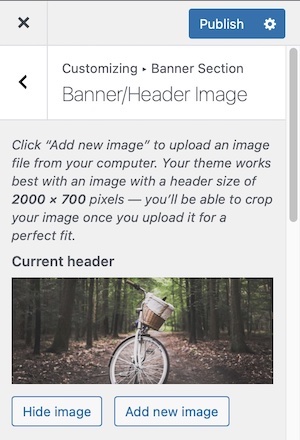
Bannner Media section allows user to upload an image for the image banner.
Banner Options
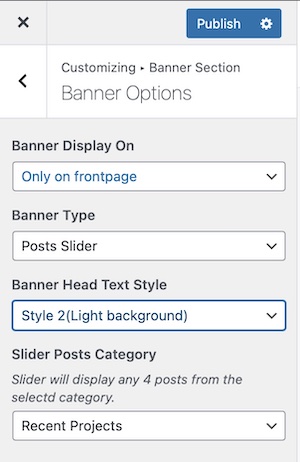
To customize the banner section:
- Go to Dashboard > Appearance > Customize > Banner Section
- Go to Banner Media.Set your desired image for Image Banner Section.
- Click on publish to retain the selections.
Layout

The Layout section allows user to set the layout for the post, page and navigation container.
Container Layout
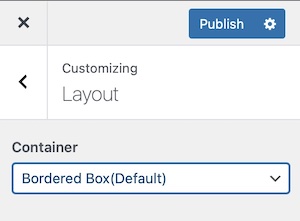
Four different styles are available for container layout:
- one container
- simple container
- boxed container
- shadowed container
To customize the container layout:
- Go to Dashboard > Appearance > Customize > Layout
- Go to Container LayoutSelect your desired layout.
- Click on Publish to retain the selections.
Navigation Layout

Navigation layout section 3 different types of navigation styles:
- Site Brand name and Navigation Items in same line
- Site Brand name followed by Navigation Items on next line
- Navigation Items followed by site brannd name on next line
- shadowed container
The navigation layout section also gives an option to align menu items on the left, right or center.
To customize the navigation layout:
- Go to Dashboard > Appearance > Customize > Layout
- Go to Navigation LayoutSelect your desired navigation layout.
- Choose the desired navigation text alignment.
- Click on Publish to retain the selections.
Content Sidebar
User can select the position for the sidebar or page without sidebar from this section. User can set the content sidebar positions for:
- Blog Post/Index Post page
- Archive Page
- Single Page
- Single Post

To customize the font family of different elements:
- Go to Dashboard > Appearance > Customize > Layout
- Go to Blog Posts/Single Post/Single Page section depending on the page of which you want to set the sidebar position.
- You will find content/sidebar settings for Blog Page, Archive Page, Single Post and Single Page.
- Choose your desired option for each type of page
- Click on Publish to retain the selections.
Blog Posts Layout

Different blog posts layout option are as given below:
- List
- List Alternate
- Masonry
- Masonry Compact
- Masonry Cards
- Grid
- First big other small posts
- First big next two small posts
This section also gives text alignment optionn for the blog post text content. User can choose from four different alignment options like: left, right, center and none.
To customize the Blog Posts layout:
- Go to Dashboard > Appearance > Customize > Layout
- Go to Blog Posts LayoutSelect your desired layout.
- Choose the text alignment.
- Click on Publish to retain the selections.
Single Post Layout
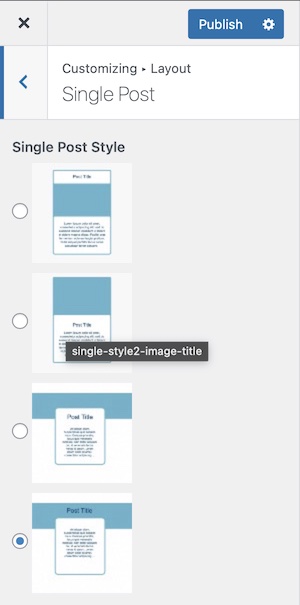
There are currently four options available for single post layout:
- Post Title followed by featured image
- Featured image followed by post title
- Screen wide featured image
- Post Title over Screen wide featured image
Single Page Layout
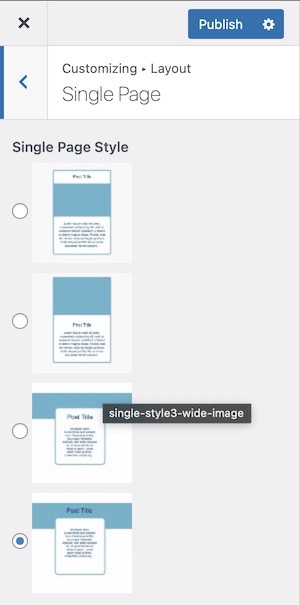
There are currently four options available for single post layout:
- Post Title followed by featured image
- Featured image followed by post title
- Screen wide featured image
- Post Title over Screen wide featured image

Typography section in customizer allows you to set font-family and font size for the body text, heading text and menu items links.


You can set font family for:
- Body Text
- Heading Text
- Menu Item textMenu Item text font family can be same as body font family or heading text font family.
To customize the font family of different elements:
- Go to Dashboard > Appearance > Customize > Typography
- Go to Font FamilySelect your desired font family for body and heading text.
- Click on Publish to retain the selections.
You can set font size for:
- Site Title (on desktop)
- Site Title (on small devices)
- Body Text
- Heading Text
- Menu Item text
- Blos posts title on index page
- Single post title
- Single page title
- Headings (H1 to H6)
To customize the font size of different elements:
- Go to Dashboard > Appearance > Customize > Typography
- Go to Font SizeChange the font size for different elements if you want to.
- Click on Publish to retain the selections.
Colors
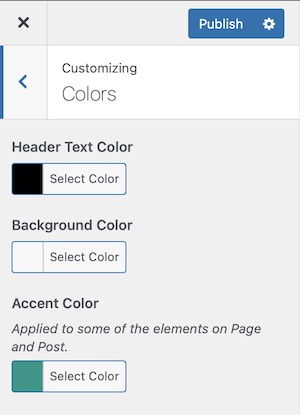
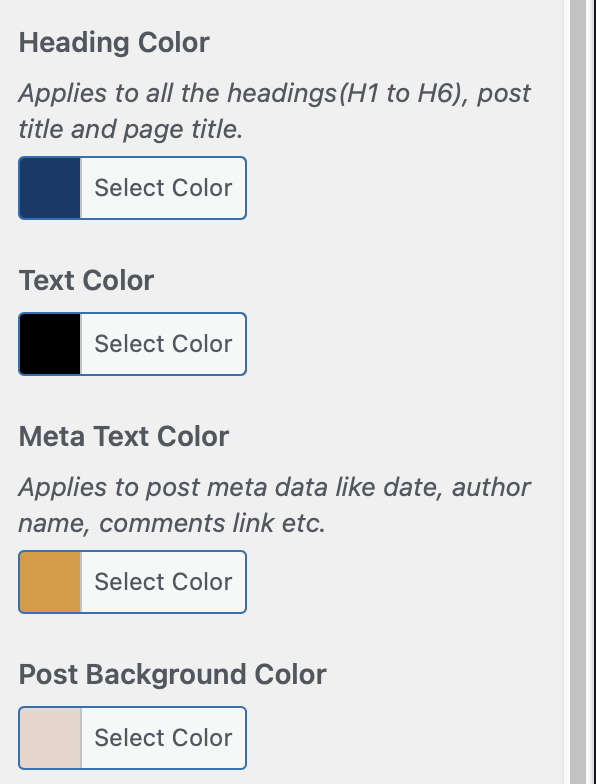
The list of the element of which you can set color of your choice as below:
- Site Header Text
- Site Background
- Accent Color
- Menu background
- Menu item link color
- Menu item link hover color
- Footer background color
- Footer text color
- Footer link color
To customize the color of different elements:
- Go to Dashboard > Appearance > Customize > Colors
- Set the desired colors for different web page elements
- Click on Publish to retain the selections.
Theme Other Options
[
Neel theme has easy to customize theme options. With these customization options, the user can change the look and feel of the site.
Blog Page Options
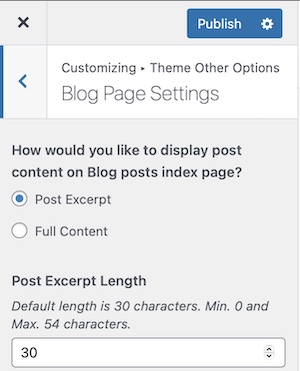
This section allows you to customize Blog Page/Index Page. It has the following customization options:
User is given two choices. Whether to display post excerpt or full post on blog posts/posts index page.
User can also set length of the post excerpt displayed on the blog index page.
To customize the blog post options:
- Go to Dashboard > Appearance > Customize > Theme Other Options
- Select the post display type and post excerpt length.
- Click on Publish to retain the selections.
Footer Options

Footer section allows user to add credit link inn footer of the site. The section also allows user to add scroll to top button.
- Go to Dashboard > Appearance > Customize > Theme Other Options
- Go to Footer Options. Add the footer credit information.
- Click on Publish to retain the selections.
Social Menu Section
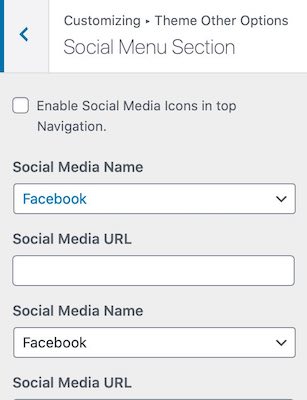
In the Social Menu section, users can set links to any four social media profiles. This social media menu will be added to the primary menu of the site.
To add social media links in the primary menu:
- Go to Dashboard > Appearance > Customize > Theme Other Options
- Go to Social Media section. Add the social media links.
- Click on Publish to retain the selections.

Widget Areas
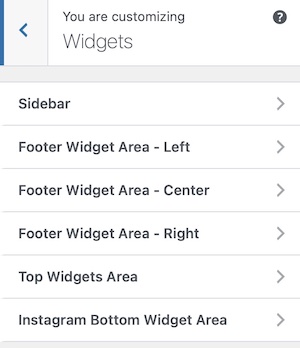
The user is provided with six widget areas to insert widgets. User has a sidebar widget area and three footer widget areas.The top widget area allows user to insert widgets like about us, news letter subscription or any other widget of his/her choice. The widget area is boxed area. The Instagram Widget Area at the bottom of the page is full width widget area and gives user an option to insert instagram related widgets or any other widget at the bottom of the page content.
To insert widgets in this area:
- Go to WordPress Customizer > Widget
- Add New Widgets
- Save the settings